

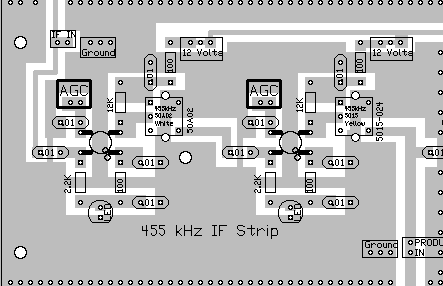
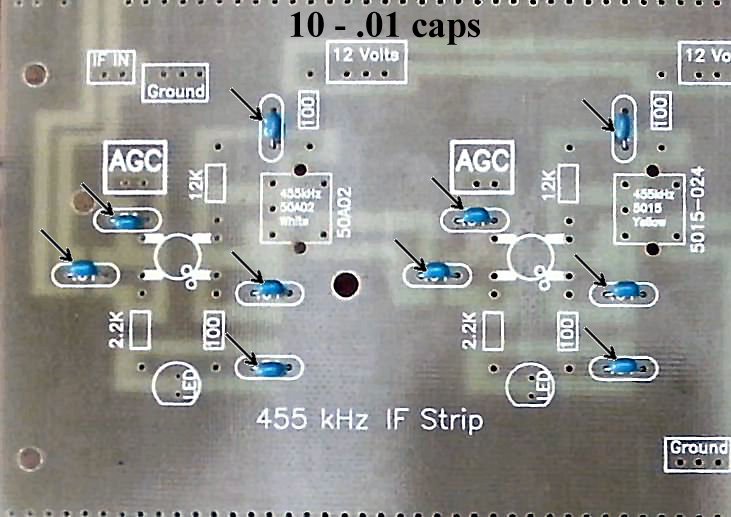
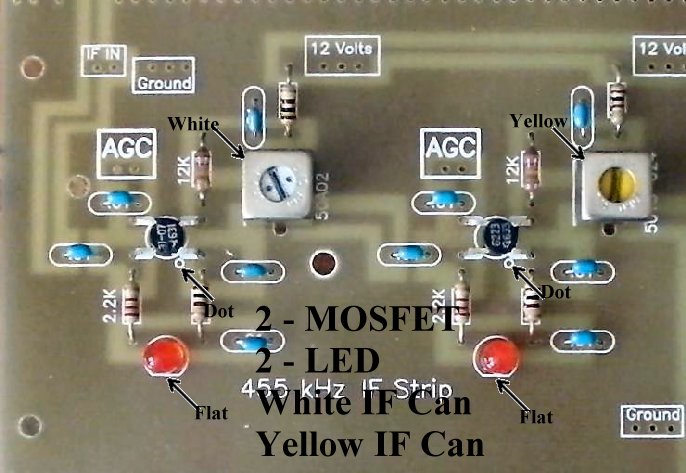
 Insert all the components that have their values inside the footprint. They are the following: ____10 - .01 capacitors (Bag 3) |
|
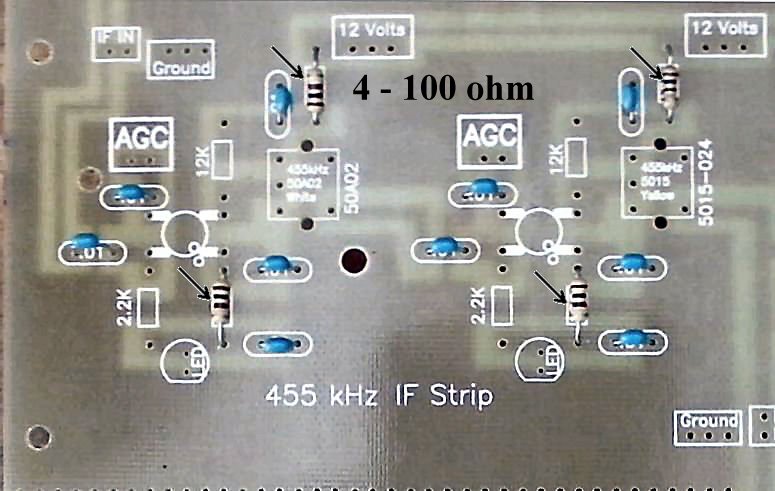
Solder  ____4 - 100 ohm resistors (brown, black, brown) (Bag 3) |
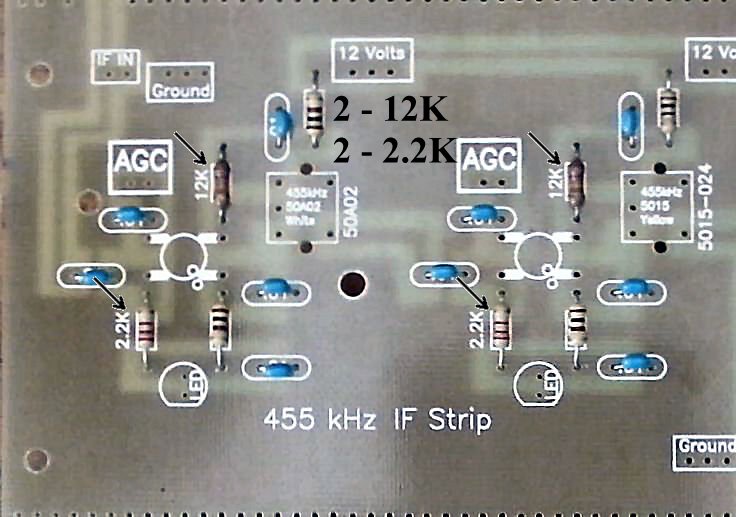
 Resistors:____2 - 12K (Bag 4), Above the right side of the MOSFETs. |
|
Solder  Other Parts:____2 - MOSFETs (Bag 2), (Picture) static sensitive part, touch a ground wire before taking it out of the bag, notice the dot on MOSFET (may be difficult to see, hold at an angle to a light source and you can see the shadow of the dot), the dot is located to the left of the second line of the text on the MOSFET.A dot is placed outside the footprint so that you can double check your placement after it has been soldered to the PCB. The leads on each side of the part need to spread apart slightly to fit the footprint. Solder ____2 - LED (Bag 3), Red colored, match the flat on the LED to the flat on the footprint. Located below the MOSFETs. The short lead is on the same side as the flat. |
|
Solder  AGC and S-Meter
|
|
Approximate time to complete 0:42
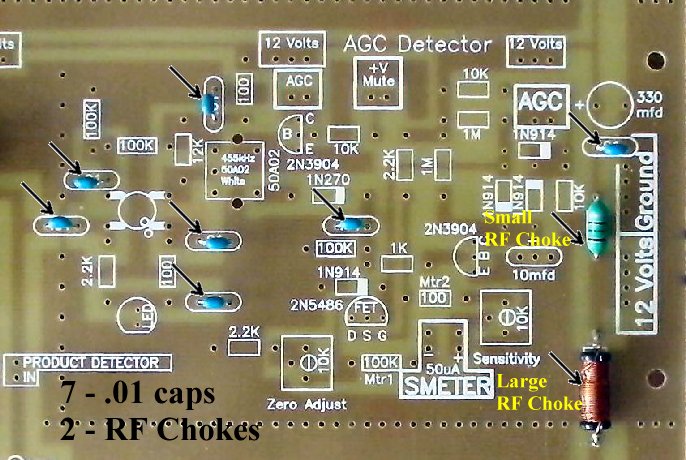
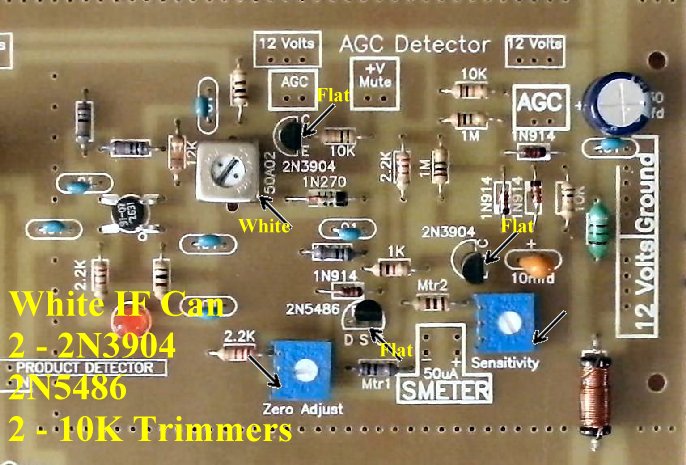
Note: If you are using the Plastic S-Meter (the one listed on the order form), with the 200uA movement, for Mtr1 use a 22K resistor (check S-Meter package for resistor) instead of a 100K as shown on the PCB. That will lower the 100K resistors you will use to 3 instead of 4 as noted below. The Mtr2 value will not change, a 100 ohm resistor will be used as noted on the PCB. If you are using the 50uA S-Meter, use the values as shown on the PCB and follow the instructions below exactly. Insert all the components that have their values inside the footprint. They are the following: ____7 - .01 capacitors (Bag 3) |
|
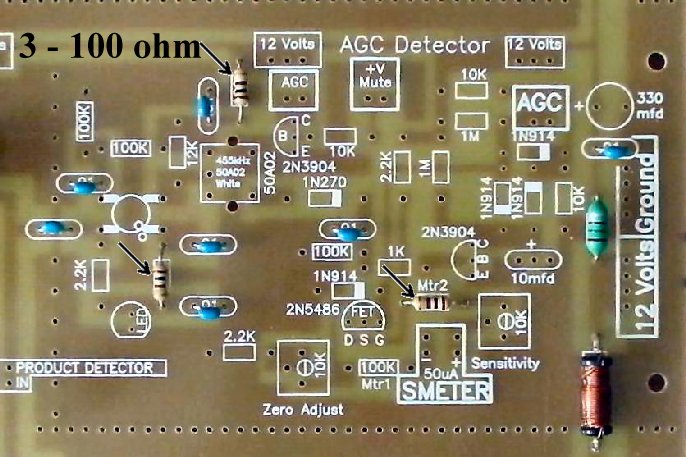
Solder  ____3 - 100 ohm resistors (brown, black, brown) (Bag 3) |
|
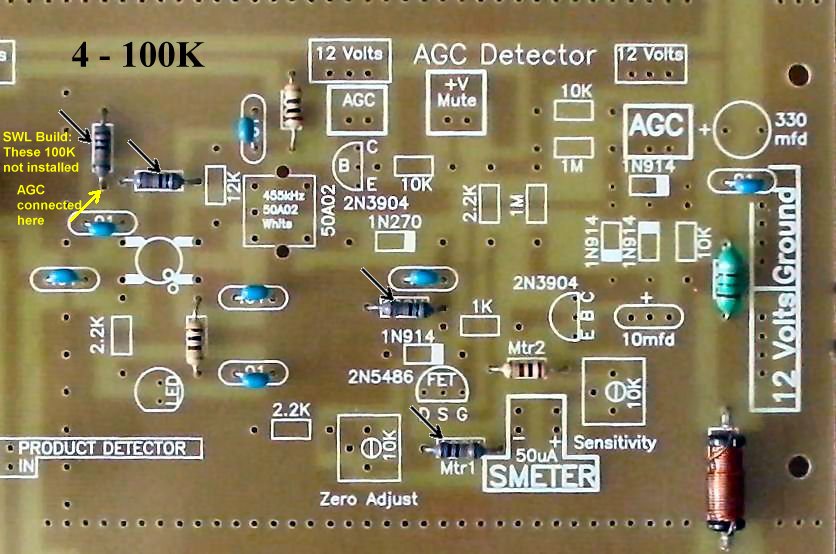
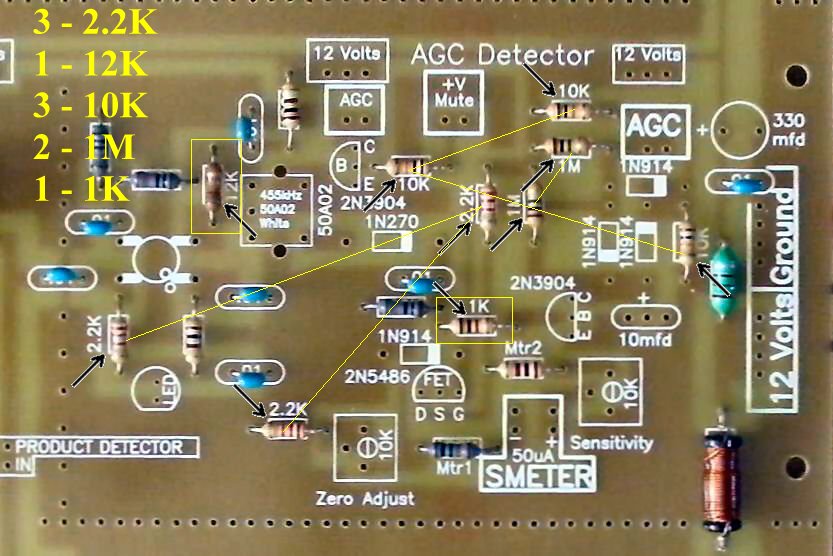
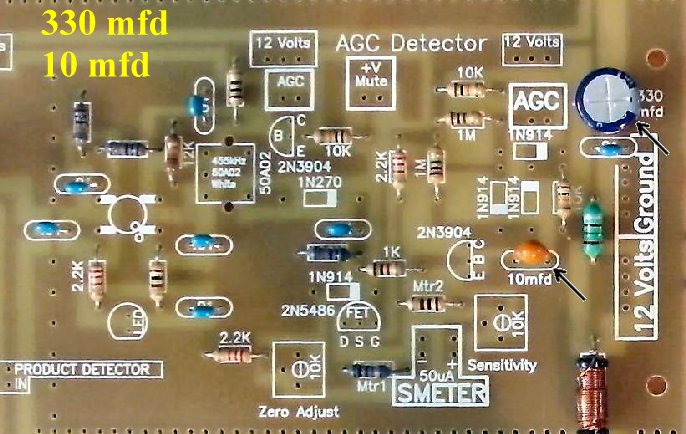
Solder  ____4 - 100K resistors (brown, black, yellow) (Bag 3) Remember, if you are using the plastic S-Meter, the 100K resistor at Mtr1 will be 22K in place of the 100K. |
|
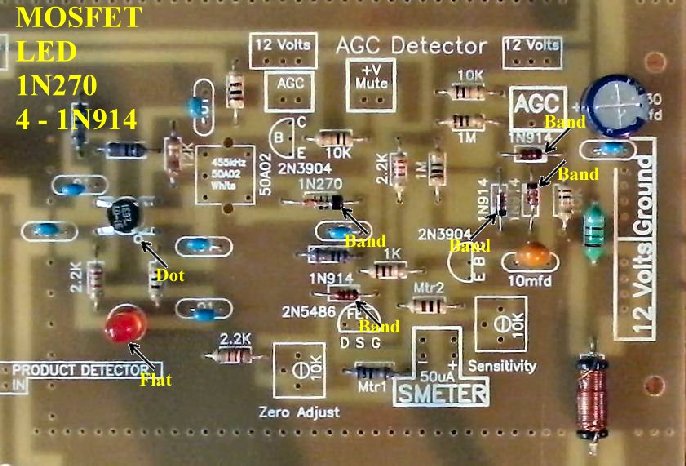
Solder  Other Parts:____1 - LED (Bag 3), Red colored, match the flat on the LED to the flat on the footprint. Located below the MOSFET. The short lead is on the same side as the flat. |
|
Solder  |

|
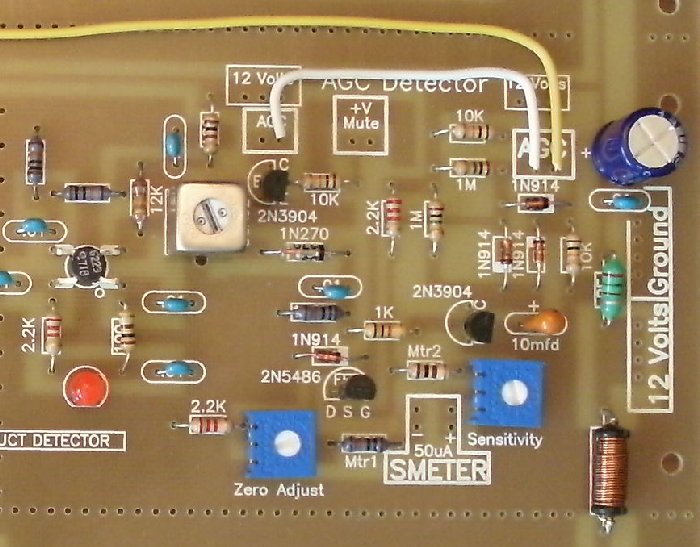
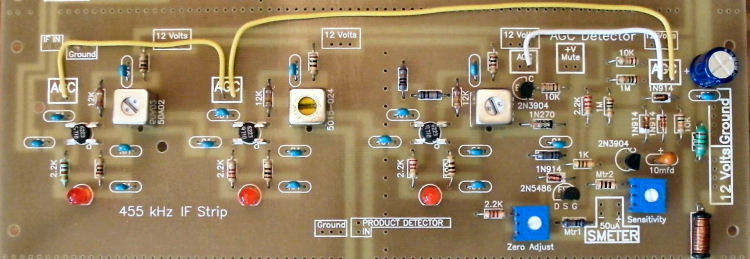
____Cut one 3" length of hookup wire and connect the AGC Squares (BOLD lined squares) at the first and second amplifier in the IF strip. This can be done underneath the board to provide a cleaner appearance above the board. Picture |
|
Solder  Double Checking Your Work____Check the dots on the MOSFETs. |
Send E-Mail || Amateur Radio Receivers || Back to Ham Radio Instructions for the Blue Lightning Transceiver

