
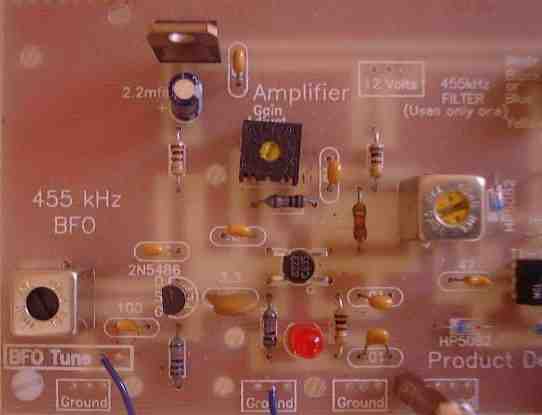
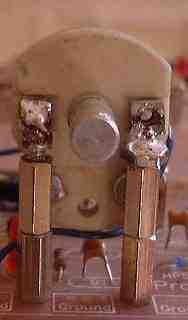
| The BFO and BFO amplifier without the BFO capacitor in the way. Note the black PC mount "Gain Adjust" pot. |
|
The BFO capacitor mounted above the BFO circuitry. Note the wire going from the stator on the BFO capacitor to the BFO Tune square. Have the BFO capacitor half way opened (as in the picture) when adjusting the BFO coil (Black core 455 kHz can on the left). |
|
The standoffs mounted on the PCB pre-tined with solder ready to solder on the capacitor. |
|
Brass nuts are the easiest to use. Filing the chrome |
|
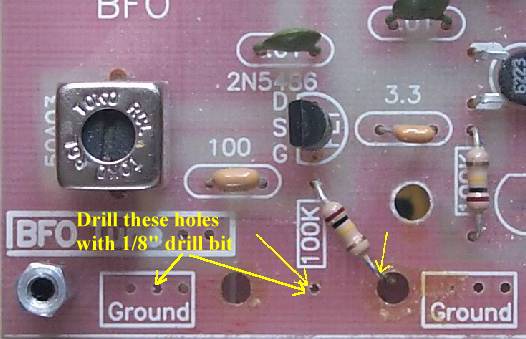
This modification will mount the BFO capacitor in a location out of the way of the VFO mounting spacers. This modification makes it much easier to lift the top board from the mounting spacers and work on the receiver. It involves moving a 100K resistor, drilling two holes with 1/8" drill bit in the old resistor mounting hole and the center ground hole in the "Ground" box next to the corner mounting spacers. |
|
Arrows show where the resistor was unsoldered and to which hole it was moved and resoldered to ground. Drill the holes pointed out with a 1/8" drill bit. |
|
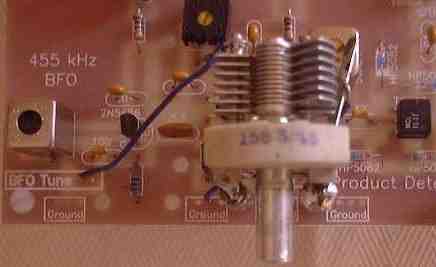
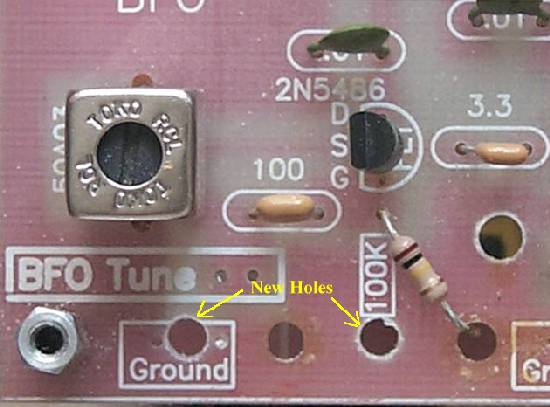
Shows holes drilled ready to mount BFO capacitor. |
|
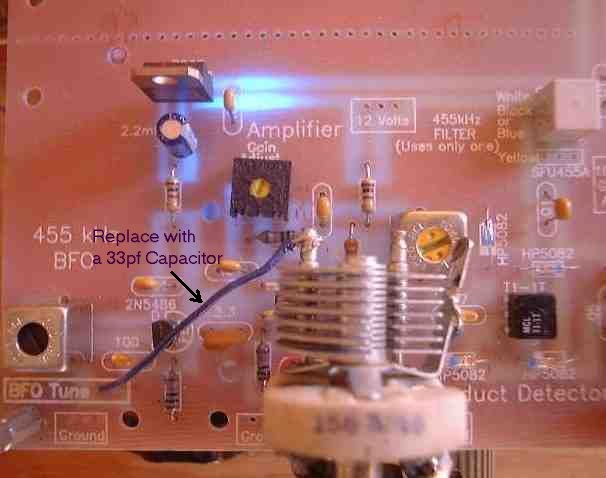
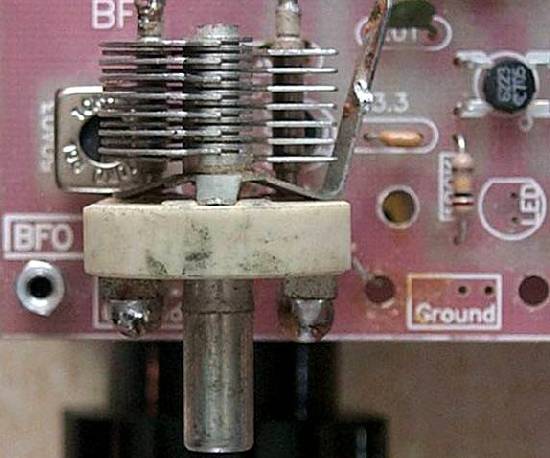
Shows final mounting of the BFO capacitor in its new location. Use a 33pf capacitor to connect the stator to the "BFO Tune" box to spread the tuning out for easier adjustments. |
|
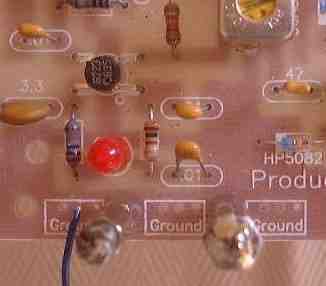
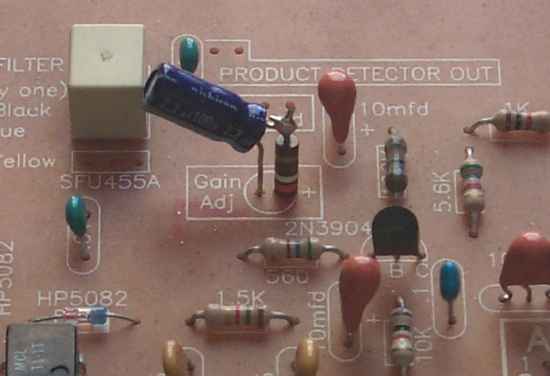
NOTE: There is an optional "Gain Adjust" electrolytic capacitor in the pre-amplifier. The "Gain Adjust" cap adjusts the gain of the audio pre-amplifier. In recent experiments, the best value for the gain adjust is a 470 ohm resistor in series with a 2.2mfd electrolytic. The image below shows the mounting of the 470 ohm resistor (Bag 4) and 2.2mfd electrolytic capacitor (Bag 4). The pre-audio amplifier was modeled in LTSpice to find the best value for maximum output with no distortion. |
Send E-Mail || Amateur Radio Receivers || Electroluminescent Receiver || Back to Ham Radio Instructions